A walk-in greenhouse provides year-round plant protection and gardening convenience․ This guide offers a comprehensive overview of assembly steps, ensuring a successful DIY experience for gardeners of all levels․
1․1 What is a Walk-In Greenhouse?
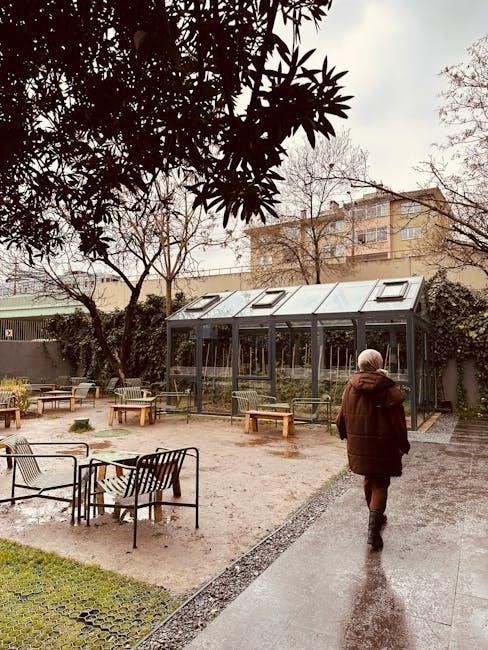
A walk-in greenhouse is a freestanding structure designed to protect plants year-round, offering easy access for gardening․ Typically made of durable materials like metal or PVC frames with polyethylene or polycarbonate covers, it provides a controlled environment for plant growth․ These greenhouses are spacious enough to walk inside, allowing gardeners to tend to plants comfortably․ They often feature shelves, vents, and doors for ventilation and accessibility․ Walk-in greenhouses are ideal for extending the growing season, shielding plants from harsh weather, and creating a stable climate for various crops․ Their compact yet functional design makes them a popular choice for backyard gardeners and hobbyists alike․
1․2 Importance of Proper Assembly
Proper assembly of a walk-in greenhouse is crucial for ensuring structural integrity, durability, and optimal performance․ A well-assembled greenhouse withstands environmental stresses like wind and rain, protecting your plants effectively․ Misaligned frames or improperly secured panels can lead to leaks, damage, and safety hazards․ Following the manufacturer’s instructions closely ensures all components fit together correctly, maintaining the greenhouse’s stability and functionality․ Additionally, proper assembly prevents costly repairs and extends the lifespan of the structure․ By paying attention to detail during assembly, you create a reliable and efficient growing environment that supports healthy plant growth and enhances your gardening experience․

Tools and Materials Required
Essential tools include a drill, screwdrivers, wrench, and level․ Materials provided in the kit typically include pre-cut frames, panels, doors, and hardware for secure assembly․
2․1 Essential Tools for Assembly
Key tools for assembling a walk-in greenhouse include a drill, screwdrivers (both Phillips and flathead), an adjustable wrench, and a level․ Additionally, a measuring tape, Allen keys, and a rubber mallet may be needed․ Ensure you have a workbench or sturdy surface for laying out parts․ Safety gear like gloves and safety goggles is recommended to protect against sharp edges or debris․ Organize all tools beforehand to streamline the process․ Refer to the manufacturer’s manual for specific tools required for your kit, as some may need specialized equipment․ Having the right tools on hand ensures a smooth and efficient assembly experience․
2․2 List of Materials Provided in the Kit
A typical walk-in greenhouse kit includes a pre-cut frame (aluminum or steel), polycarbonate or polyethylene panels for the walls and roof, door and window frames, shelves, and support beams․ Hardware such as bolts, screws, and connectors are provided for assembly․ Instructions and diagrams are also included to guide the process․ Some kits may offer additional features like automatic vents, irrigation systems, or adjustable shelving․ Ensure all components are accounted for by cross-referencing with the provided inventory list․ Double-check for any missing or damaged parts before starting assembly to avoid delays․ The kit is designed to be self-contained, minimizing the need for extra materials․
Pre-Assembly Preparation
Before starting, ensure the site is level and clear of debris․ Organize all components and tools, and review the manual to plan the assembly process efficiently․
3․1 Choosing the Right Location
Selecting the ideal spot for your walk-in greenhouse is crucial for optimal performance․ Ensure the area receives sufficient sunlight, ideally 6-8 hours daily, and is level to prevent water pooling․ Avoid low-lying areas prone to flooding and choose a spot with good drainage․ Consider wind direction to protect the structure from harsh gusts․ Ensure easy access to water and electricity if needed․ Measure the space to accommodate the greenhouse size comfortably․ Avoid shading from trees or buildings and check for any underground utilities․ A well-chosen location will enhance plant growth and simplify maintenance, ensuring your greenhouse operates efficiently year-round․
3․2 Preparing the Site
Before assembling your walk-in greenhouse, ensure the site is properly prepared․ Clear the area of debris, rocks, and vegetation to create a smooth, even surface․ Check for underground utilities and avoid areas with standing water․ Level the ground using sand or gravel for drainage and stability․ Mark the perimeter with stakes and string to guide placement․ If necessary, lay a foundation, such as a concrete slab or wooden platform, to ensure the greenhouse sits level and secure․ Proper site preparation prevents structural issues and ensures the greenhouse stands firmly, ready for assembly and years of reliable use․
3․4 Unpacking and Organizing Components
Begin by carefully unpacking all components from the greenhouse kit․ Check the contents against the provided parts list to ensure nothing is missing or damaged․ Separate and categorize parts, such as frames, screws, panels, and hardware, to simplify assembly․ Label each group for easy identification․ Store small items like bolts and screws in a designated container to prevent loss․ Lay out larger components in a logical order, following the assembly sequence outlined in the manual․ This systematic approach helps avoid confusion and ensures a smooth assembly process․ Use a checklist to track progress and verify that all parts are accounted for before starting․
Main Assembly Steps
Start with the base frame, then construct the main structure, install the roof, attach doors, add windows, and secure the greenhouse․ Follow instructions carefully for stability․
4․1 Assembling the Base Frame
Begin by gathering all base frame components, such as the bottom rails, corner connectors, and floor brackets․ Follow the manual to identify each part․ Lay out the components on a flat surface and ensure all pieces are accounted for․ Use a wrench or screwdriver to secure the corners to the rails, tightening bolts firmly but avoiding over-tightening․ Double-check that the frame is square by measuring diagonals․ Once the base is assembled, use a level to ensure it is even and stable․ This step is crucial as it forms the foundation of your greenhouse․ Refer to the provided diagrams for clarity, and tighten all bolts gradually to maintain alignment․ If needed, use a rubber mallet to tap pieces into place without causing damage․
4․2 Constructing the Main Structure
With the base frame secure, attach the side walls to the base using the provided brackets and bolts․ Ensure each wall is aligned properly and tightened evenly․ Next, stand the rear and front walls, connecting them to the side walls using the same method․ Use a level to verify the structure is plumb and stable․ Attach the roof supports to the top of the walls, ensuring they are evenly spaced and securely fastened․ Finally, install the vertical posts to reinforce the structure․ Double-check all connections for tightness and alignment․ This step establishes the greenhouse’s framework, ensuring it is sturdy and ready for the roof installation․
4․3 Installing the Roof Frame
Begin by carefully placing the roof frame onto the main structure, ensuring it is centered and aligned with the walls․ Secure the frame using the bolts and brackets provided in the kit․ Tighten all connections firmly but avoid over-tightening․ Next, attach the crossbeams and diagonal supports to reinforce the roof frame․ Use a level to ensure the roof is evenly balanced and properly sloped for water runoff․ Once the frame is secure, install the roofing materials according to the manufacturer’s instructions․ Finally, double-check all bolts and connections to ensure the roof is stable and ready for additional components like windows or vents․ Proper installation ensures structural integrity and weather resistance․
4․4 Attaching the Doors
Align the door frames with the doorway openings, ensuring proper fit and alignment․ Secure the hinges to the frame using the provided screws․ Attach the doors to the hinges, making sure they swing smoothly․ Install the locking mechanism or handles according to the instructions․ Use a level to ensure the doors are evenly hung and properly aligned․ Tighten all screws firmly but avoid over-tightening․ Test the doors to ensure they open and close smoothly․ If necessary, adjust the hinges for proper alignment․ Finally, inspect the doors for any gaps and seal them with weatherstripping if provided․ Properly installed doors ensure easy access and maintain a controlled environment inside the greenhouse․
4․5 Adding Windows and Vents
Begin by aligning the windows with the pre-drilled holes on the greenhouse frame․ Secure them using the provided screws or clips, ensuring a tight fit․ For vents, attach them to the roof or side panels, following the manufacturer’s instructions․ Use a level to ensure proper alignment and a drill to screw them into place․ Install automatic vent openers if included in your kit for better temperature regulation․ Once installed, test the windows and vents to ensure they open and close smoothly․ Properly sealed windows and functional vents are crucial for maintaining airflow and preventing overheating․ Double-check all fittings for a weather-tight seal․
4․6 Installing Shelves and Supports
Position the shelves inside your greenhouse, aligning them with the pre-marked brackets on the frame․ Attach the shelves using the provided screws or clips, ensuring they are evenly spaced and level․ For added stability, install support beams between the shelves and the frame․ Tighten all bolts securely to prevent wobbling․ If your kit includes adjustable supports, set them to the desired height for optimal plant arrangement․ Make sure not to overload the shelves beyond their weight capacity․ Once installed, test the shelves by gently applying pressure to ensure they are sturdy․ Properly installed shelves and supports will enhance your greenhouse’s functionality and organization․ Always refer to the manual for specific configurations․
4․7 Securing the Greenhouse
Once the main structure is assembled, secure the greenhouse to the ground using anchor kits or lag bolts to prevent movement from wind․ Tighten all bolts and connections to ensure stability; Apply weatherproofing measures, such as sealing gaps between panels and applying protective coatings to metal parts․ Double-check the doors and windows to ensure they are properly aligned and functioning smoothly․ Finally, perform a final inspection of the entire structure, ensuring all components are firmly in place and the greenhouse is level․ This step is crucial for maintaining the integrity of your greenhouse and protecting your plants from environmental stress․

Finishing Touches
Add flooring for durability and install irrigation systems for efficient watering․ Set up electrical components like lighting and heating to create an optimal growing environment for your plants year-round․
5․1 Adding Flooring
Adding flooring to your walk-in greenhouse is essential for durability and ease of maintenance․ Begin by clearing the site of debris and leveling the ground․ Lay down a weed barrier fabric to prevent plant growth․ Install gravel or wood planks for drainage and a sturdy surface․ Ensure the flooring material is weather-resistant and fits the greenhouse dimensions․ Proper flooring enhances accessibility and protects plants from moisture․ Follow the manufacturer’s instructions for specific flooring types, such as interlocking tiles or concrete․ Regularly clean and inspect the flooring to maintain a healthy growing environment․ This step completes the greenhouse setup, making it ready for plant placement and daily use․
5․2 Installing Irrigation Systems
Installing an irrigation system in your walk-in greenhouse ensures efficient water delivery to plants․ Start by connecting a water source to the main tubing, then attach drip emitters or sprinklers․ Place emitters near plant bases for optimal water distribution․ Use timers or automated controllers to schedule watering sessions, reducing manual effort․ Secure tubing with clips to prevent damage and ensure proper water flow․ Regularly inspect the system for leaks or blockages to maintain efficiency․ Avoid overwatering by adjusting flow rates according to plant needs․ This step enhances plant health and simplifies greenhouse maintenance, ensuring your garden thrives year-round with minimal effort and water waste․
5․3 Setting Up Electrical Components
Setting up electrical components in your walk-in greenhouse is crucial for powering lights, heaters, and ventilation systems․ Begin by routing cables safely through weatherproof conduits to avoid water damage․ Install outlets and switches in convenient locations, ensuring they are GFCI-protected for outdoor use․ Connect lighting systems, such as LED grow lights, to promote plant growth․ Use timers or smart controllers to automate operations․ Ensure all connections are secure and meet local electrical codes․ Test the system thoroughly before use․ Consider energy-efficient options to reduce costs․ Proper installation enhances functionality and safety, creating an optimal environment for your plants to thrive year-round․
Maintenance and Upkeep
Regular cleaning, inspecting for damage, and ensuring proper ventilation are essential for maintaining your walk-in greenhouse․ Secure all components and replace worn parts to ensure longevity and functionality․
6․1 Regular Cleaning
Regular cleaning is crucial for maintaining a healthy environment inside your walk-in greenhouse․ Start by gently removing dirt and debris from the windows and frames using a soft cloth and mild soap․ Hose down the structure with a low-pressure garden hose to eliminate dust and pollen․ For tougher stains, mix mild dish soap with water and apply it with a soft brush․ Avoid using harsh chemicals that might damage the materials or harm plants․ Clean the floors regularly to prevent mold and mildew growth․ Ensure all vents and doors are free from obstructions to maintain proper airflow․ Regular cleaning prevents pest infestations and ensures optimal growing conditions․
- Clean windows and frames with a soft cloth and mild soap․
- Use a low-pressure hose to remove dust and pollen․
- Avoid harsh chemicals to protect materials and plants․
- Keep floors clean to prevent mold and mildew․
- Ensure vents and doors are unobstructed for airflow․
Regular maintenance ensures a healthy and productive greenhouse environment․
6․2 Checking for Damage
Regularly inspect your greenhouse for any signs of damage to ensure longevity and functionality․ Check the frame for dents, rust, or loose connections, and tighten any bolts or screws that may have come undone․ Inspect the roof for leaks or gaps, especially after severe weather․ Examine doors and windows to ensure they open and close properly, and replace any broken or cracked panes․ Look for signs of pests or mold, which can weaken the structure․ Addressing minor issues promptly prevents them from becoming major problems․ Schedule inspections after extreme weather conditions or seasonal changes to maintain your greenhouse in optimal condition․
- Inspect frames for dents, rust, or loose connections․
- Check the roof for leaks or gaps, especially after storms․
- Ensure doors and windows function smoothly․
- Replace broken or cracked panes immediately․
- Look for signs of pests or mold․

Regular inspections help maintain the integrity and functionality of your greenhouse․
6․3 Ensuring Proper Ventilation
Proper ventilation is crucial for maintaining a healthy environment inside your greenhouse․ It regulates temperature, humidity, and airflow, preventing mold and promoting plant health․ Ensure all windows, vents, and doors are installed correctly and function as intended․ Open vents during the day to allow hot air to escape and close them at night to retain heat․ Consider installing automatic vent openers for convenience․ Regularly check for blockages in vents and clean them to ensure airflow․ Proper ventilation also helps prevent pests and diseases, ensuring your plants thrive year-round․
- Open vents and windows during the day to release hot air․
- Close vents at night to retain heat and protect plants from cold․
- Install automatic vent openers for effortless temperature control․
- Check and clean vents regularly to maintain airflow․
- Ensure doors seal properly to prevent drafts and heat loss․
Tips and Tricks for Successful Assembly
Organize components beforehand, follow instructions carefully, and assemble in a shaded area to avoid hardware heating․ Work methodically, double-checking each step for accuracy and safety․
7․1 Following Manufacturer Instructions
Adhering to the manufacturer’s instructions is crucial for a smooth assembly process․ Each step is designed to ensure safety and structural integrity․ Start by thoroughly reading the manual to understand the sequence of tasks and required tools․ Pay attention to diagrams and part labels, as they guide the correct placement of components․ Deviating from instructions can lead to errors, potentially compromising the greenhouse’s stability․ If unsure, refer back to the manual or seek clarification․ Consistent adherence ensures a professional finish and prevents future issues․ Always prioritize manufacturer guidelines to achieve a durable and functional walk-in greenhouse․ Proper assembly guarantees years of reliable use and optimal plant growth․
7․2 Using the Right Techniques
Employing proper assembly techniques ensures a sturdy and durable walk-in greenhouse․ Begin by aligning frame components accurately, using a level to guarantee evenness․ Tighten bolts gradually to avoid warping the structure, and ensure all connections are secure․ When attaching panels, start from the base and work upward to maintain stability․ Weatherproofing materials, like seals and tapes, should be applied correctly to prevent leaks․ Use tools as intended to avoid damaging parts․ Patience and precision are key to achieving a professional finish․ If unsure about a method, consult the manual or seek guidance to ensure long-term performance and safety of your greenhouse․
7․3 Seeking Help When Needed
Seeking help when needed is crucial for a successful greenhouse assembly․ Don’t hesitate to consult online forums or video tutorials if instructions are unclear․ Manufacturer support is often available for specific queries․ If a step feels too complex, consider enlisting a friend or family member with DIY experience․ Additionally, local hardware stores or gardening communities can provide valuable insights․ Remember, asking for help ensures accuracy and prevents costly mistakes, leading to a well-constructed and functional greenhouse for years to come․
Common Mistakes to Avoid
Common mistakes include ignoring safety precautions, skipping manual steps, and over-tightening bolts, which can damage frames․ Avoid these errors for a secure and durable greenhouse structure․
8․1 Ignoring Safety Precautions
Ignoring safety precautions can lead to accidents and injuries during assembly․ Always wear protective gear like gloves and safety glasses to prevent harm from sharp edges or falling parts․ Ensure the workspace is clear of clutter and tripping hazards․ Never assemble during bad weather, as it can make surfaces slippery and unstable․ Properly secure heavy components before lifting to avoid strain or damage․ Follow all manufacturer guidelines for tool usage and avoid overreaching, which can cause loss of balance․ Taking shortcuts or skipping safety steps may save time but increases risks․ Stay alert and maintain a safe environment throughout the assembly process․
8․2 Skipping Steps in the Manual
Skippping steps in the manual can lead to incorrect assembly, compromising the structural integrity of your greenhouse․ Each step is designed to ensure safety and proper installation․ Misaligned frames, improperly secured panels, or incorrectly installed doors and vents are common issues when steps are skipped․ This can result in leaks, weakened frames, or even collapse under stress like wind or snow․ Always follow the sequence outlined in the instructions to avoid costly mistakes․ Double-check each completed step before moving forward to ensure everything is secure and aligned properly․ Patience and attention to detail are key to a successful and durable assembly․
8․3 Over-tightening or Under-tightening Bolts
Over-tightening or under-tightening bolts is a common mistake during greenhouse assembly․ Over-tightening can strip screw heads or damage frames, while under-tightening may lead to loose connections and instability․ Both issues compromise the structure’s integrity, especially under wind or snow loads․ Always use a torque wrench and follow the manufacturer’s tension specifications․ Check each bolt periodically to ensure they remain secure without being overtightened․ Proper tension ensures the greenhouse stands firm and withstands environmental stresses, preventing costly repairs and ensuring long-term durability․ Regular inspections can help maintain the stability and safety of your greenhouse throughout the seasons․
Successful greenhouse assembly ensures a durable, functional space for year-round gardening․ Follow instructions carefully to enjoy optimal plant growth and protection from harsh weather conditions․
9․1 Summary of Key Assembly Steps
Assembling a walk-in greenhouse involves several critical steps․ Begin by constructing the base frame, ensuring it is level and secure․ Next, build the main structure, attaching sidewalls and roof supports; Install the roof frame, followed by doors, windows, and vents for proper ventilation․ Add shelves and supports for plants and ensure all components are tightly secured․ Finally, perform a safety check and ensure all parts are properly aligned․ Following the manufacturer’s instructions and taking safety precautions will help you complete the assembly efficiently and enjoy your new greenhouse for years to come․ Proper assembly ensures durability and functionality․
9․2 Final Tips for a Successful Greenhouse
For a thriving greenhouse, ensure proper ventilation and maintain consistent temperatures․ Regularly inspect for damage and address issues promptly․ Use high-quality materials and follow manufacturer instructions closely․ Keep the greenhouse clean and well-organized to maximize space and efficiency․ Consider adding automation for irrigation and lighting to simplify upkeep․ Double-check all bolts and connections for tightness before final use․ By adhering to these tips, you’ll create a durable, functional, and productive growing environment․ Remember, patience and attention to detail are key to a successful assembly and long-lasting greenhouse performance․

Additional Resources
Find assembly manuals, instructional videos, and expert guides on brand websites like Vevor, Outsunny, and Amazon․ Check YouTube for detailed walkthroughs and DIY tips from gardening enthusiasts․
10․1 Where to Find Assembly Manuals
Assembly manuals for walk-in greenhouses can be found on the manufacturer’s official website or provided in the kit․ Brands like Vevor and Outsunny offer downloadable PDFs․ Additionally, retailers like Amazon and Costco often include links to manuals in product descriptions․ YouTube channels and gardening forums are excellent resources for video tutorials and troubleshooting tips․ Ensure to download the correct manual for your specific model to avoid confusion during assembly․ Always verify the source for accuracy and safety․ Checking the manufacturer’s support page is also recommended for updated instructions and troubleshooting guides․
10․2 Recommended Tools and Accessories
Essential tools for assembling a walk-in greenhouse include screwdrivers, wrenches, a drill, and a level․ A measuring tape and rubber mallet are also useful․ Many kits specify needing a socket wrench for bolts․ Accessories like weatherproof tape for repairs and work lights for visibility are helpful․ Shelving units and plant stands can enhance functionality․ Ensure tools are compatible with the materials provided․ Always organize tools beforehand to streamline the process․ Manufacturers often list recommended tools in assembly manuals, so check those for specifics․ Proper tools ensure a smooth assembly and prevent damage to greenhouse components․