
Building a 6-foot picnic table is a great DIY project for outdoor enthusiasts․ These plans offer a traditional design, durability, and space efficiency, perfect for gatherings and family meals․
Overview of the Project
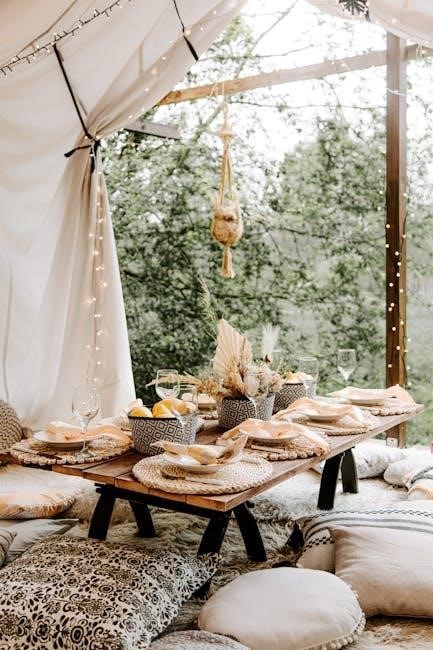
Building a 6-foot picnic table is a rewarding DIY project that combines simplicity with functionality․ The project involves constructing a sturdy table with a traditional design, featuring a 6-foot-long table top and matching bench seats․ Designed for durability and comfort, this picnic table is perfect for outdoor gatherings, parks, or backyard settings․ The plans typically include a detailed cut list, shopping list, and step-by-step instructions to ensure a smooth assembly process․ The design often incorporates a triangular support structure for added stability, while the materials are optimized for cost-efficiency and weather resistance․ Whether you’re a seasoned DIYer or a beginner, this project is designed to be achievable with basic tools and skills, resulting in a durable and long-lasting outdoor furniture piece for years of enjoyment․
Importance of Using Plans
Using detailed plans for a 6-foot picnic table ensures a successful and stress-free DIY project․ Plans provide clear guidance, including material lists, measurements, and step-by-step instructions, helping you avoid costly mistakes․ They optimize material usage, reducing waste and saving money․ With a well-structured plan, you can achieve a professional-looking table that is both durable and safe․ The inclusion of diagrams and cut lists makes the assembly process easier, even for beginners․ Proper plans also ensure the table’s stability and comfort, guaranteeing it will withstand regular use and harsh weather conditions․ By following a reliable plan, you can confidently build a picnic table that meets your needs and enhances your outdoor space․
Why Choose a 6-Foot Picnic Table
A 6-foot picnic table is an excellent choice for outdoor spaces due to its practical size and versatility․ It comfortably accommodates up to six people, making it ideal for families and small gatherings․ The compact length fits well in various settings, from backyards to parks, without occupying excessive space․ Its standard size ensures easy integration with existing outdoor furniture and decor․ Additionally, the 6-foot design is a popular choice among DIY enthusiasts, as it offers a manageable project scope while providing ample seating and surface area․ Its balanced proportions make it both functional and aesthetically pleasing, enhancing any outdoor setting while meeting the needs of various social activities․

Materials and Tools Required
For a 6-foot picnic table, you’ll need 2×6 lumber for the table top and 2x4s for the frame․ Essential tools include a drill, saw, and wrench for assembly․
Lumber and Hardware Needs
For a 6-foot picnic table, you’ll need 2×6 lumber for the table top and 2x4s for the frame․ Additional materials include 2×6 or 2×8 boards for the benches․ The hardware required includes galvanized lag screws, wood screws, and carriage bolts for durability․ Wood glue is recommended for securing joints․ Weather-resistant wood finish or sealant is optional but highly recommended to protect the lumber from moisture and UV damage․ Ensure all materials are pressure-treated or naturally rot-resistant for outdoor use․ The total lumber and hardware costs are budget-friendly, making this project accessible to DIY enthusiasts of all skill levels․
Essential Tools for the Project
The essential tools needed for building a 6-foot picnic table include a circular saw for cutting lumber, a drill for drilling screw holes, and a measuring tape for precise cuts․ A square ensures accurate angles, while clamps help hold pieces together during assembly․ Safety gear like gloves and safety glasses is a must․ A wrench or socket set is required for tightening bolts, and sandpaper is used to smooth wood surfaces․ These tools are fundamental for completing the project efficiently․ Optional tools, such as a router for rounding edges, can add a professional finish but are not necessary for basic construction․
Optional Tools for Customization
For those looking to add unique touches, optional tools can enhance the customization of your 6-foot picnic table․ A router allows you to round edges for a smoother finish, while a jigsaw can create curved or decorative cuts․ An electric sander ensures a polished surface, and a paintbrush or stain applicator lets you add color or protective finishes․ Additionally, a carving tool or wood burner can be used to add personalized designs or patterns․ These tools enable you to tailor the picnic table to your style and preferences, making it a one-of-a-kind piece for your outdoor space․ Customization options are endless with the right tools, allowing you to create a truly unique and functional outdoor furniture piece․
Step-by-Step Instructions
Follow a detailed guide to build a 6-foot picnic table, including material lists, cutting instructions, and assembly steps for the frame, top, and benches․
Preparing the Materials
Gather all materials, including lumber, screws, and bolts, as outlined in the PDF plans․ Measure and cut the wood according to the specified dimensions for the table top, frame, and benches․ Sort and organize the pieces to ensure everything is ready for assembly․ Sand the cut edges to smooth them out and remove any splinters․ Double-check the measurements to avoid errors during construction․ Use a tape measure and square to ensure accuracy․ Lay out the materials in a logical order to streamline the building process․ This preparation step is crucial for a smooth and efficient assembly of your 6-foot picnic table․
Assembling the Table Frame
Begin by gathering the frame components, including the side rails, end rails, and support beams․ Use 2×6 lumber for the table frame to ensure durability․ Align the side rails and end rails to form a rectangular base, securing them with lag screws or carriage bolts․ Attach the support beams between the side rails to add stability․ Use clamps to hold the pieces in place while drilling pilot holes and tightening the bolts․ Ensure the corners are square and the frame is level․ Once the frame is assembled, double-check all connections for tightness․ This sturdy base will support the table top and benches, providing a solid foundation for your picnic table․
Attaching the Table Top
Once the frame is assembled, place the table top planks evenly over it, ensuring proper alignment․ Use 2×6 or 2×4 lumber for the top, spaced evenly to allow for expansion․ Secure the planks to the frame using weather-resistant screws, starting from the center and working outward to avoid warping․ Drill pilot holes to prevent splitting the wood․ Space the screws approximately 12 inches apart for a sturdy attachment․ After securing all planks, sand the edges for a smooth finish․ Ensure the table top is level and evenly supported by the frame․ Properly attaching the table top ensures a stable and durable surface for outdoor use, completing the main structure of your picnic table․
Building and Attaching the Benches
Construct the bench frames using 2×4 lumber, ensuring they match the table’s width․ Attach the bench slats, typically made from 2×6 lumber, using weather-resistant screws․ Space the slats evenly for comfort and drainage․ Secure the benches to the table frame using L-brackets or screws, ensuring they are level and aligned with the table top․ Sand all edges for a smooth finish․
Attach the benches to the table frame, leaving a small gap for expansion․ Use screws to secure them firmly, ensuring stability․ Double-check the alignment and tighten all connections․ The benches should be level with the table top for even seating․ Properly attaching the benches completes the picnic table, providing sturdy and comfortable seating for users․ Ensure all screws are tightened securely for long-lasting durability․
Final Assembly and Inspection
Once all components are built, assemble the table by attaching the benches to the table frame using screws․ Ensure the benches are evenly spaced and aligned with the table top․ Tighten all connections firmly․ Inspect the entire structure for stability, checking that all joints are secure and the table is level․ Sand any rough edges or splinters to ensure safety and comfort․ Apply a wood finish or sealant if desired for weather protection․ Finally, double-check all measurements and alignments to ensure the picnic table meets the plans’ specifications․ This step ensures the table is safe, durable, and ready for use․

Design Considerations
Design your 6-foot picnic table with a traditional or modern aesthetic, ensuring durability and comfort․ Consider space-saving features and customization options for personal style․
Traditional vs․ Modern Designs
When choosing a design for your 6-foot picnic table, consider whether a traditional or modern style suits your needs․ Traditional designs often feature classic lines, sturdy frames, and a focus on durability, making them timeless and versatile for any setting․ Modern designs, on the other hand, may incorporate sleeker profiles, innovative materials, or space-saving features․ Both styles can be adapted to fit your skill level and preferences․ For a classic look, opt for pressure-treated lumber and simple assemblies․ For a contemporary feel, explore options like metal accents or minimalist frameworks․ Choose a design that balances functionality and aesthetics to enhance your outdoor space․
Space-Saving Features
Space-saving features are essential for maximizing functionality in smaller areas․ Many 6-foot picnic table plans include compact designs that allow for efficient use of space․ Foldable options are ideal for patios or balconies, enabling easy storage when not in use․ Detachable benches provide flexibility, allowing you to arrange seating as needed․ Some designs incorporate built-in storage under the table or benches, perfect for stowing cushions, utensils, or accessories․ Additionally, slim profiles and angled legs can help the table fit snugly into corners or against walls․ These features ensure that your picnic table remains practical without compromising on style or comfort, making it a versatile addition to any outdoor space․
Customization options allow you to tailor your 6-foot picnic table to suit your preferences and environment․ Wood type is a primary consideration, with choices like cedar, pine, or pressure-treated lumber offering durability and aesthetic appeal․ You can also paint or stain the table to match your outdoor decor, ensuring it blends seamlessly with your surroundings․ Benches can be designed with or without backrests for added comfort․ Some plans even include umbrella holders or cup holders for convenience․ Additionally, you can adjust the size slightly to fit specific spaces or add decorative trim for a personalized touch․ These customization options make your picnic table truly unique and functional for various settings․ Regularly seal or stain the wood to protect it from weather damage․ Clean the table seasonally to remove dirt and mildew․ Inspect and repair any damaged wood to ensure longevity․ Protecting the wood is essential to maintain the durability and appearance of your 6-foot picnic table․ Regularly apply a water-resistant sealant or stain to shield the wood from moisture and UV damage․ Use high-quality exterior wood finishes that are suitable for outdoor furniture․ Reapply the sealant or stain annually, especially in areas with harsh weather conditions․ Avoid using harsh chemicals, as they can damage the wood or strip away its natural oils․ Instead, opt for eco-friendly or waterproofing products designed for outdoor use․ Proper protection will prevent warping, rotting, and discoloration, ensuring your picnic table remains sturdy and visually appealing for years to come․ Regular cleaning is crucial for maintaining the hygiene and longevity of your 6-foot picnic table․ Use mild soap and warm water to gently scrub the surface, removing dirt, food residue, and stains․ Avoid harsh chemicals or abrasive cleaners, as they can damage the wood or strip its protective finish․ For tougher stains, mix baking soda and water to create a paste, applying it before rinsing with clean water․ Dry the table thoroughly after cleaning to prevent moisture buildup․ Regular maintenance ensures the table remains safe, clean, and inviting for outdoor gatherings․ By incorporating this routine, you’ll keep your picnic table in excellent condition year-round․ Repairing damages to your 6-foot picnic table is essential to maintain its structural integrity and appearance; Start by inspecting the table for cracks, splinters, or loose joints․ For minor cracks, use a wood filler to fill gaps and sand it smooth․ Replace any severely damaged or rotting boards with new lumber, ensuring they match the original dimensions․ Tighten loose screws or bolts and reinforce joints with additional support if needed․ For splintered areas, sand the surface thoroughly and apply a weather-resistant wood finish to protect it․ Regular inspections and timely repairs will extend the lifespan of your picnic table and keep it safe for use․ Addressing issues early prevents further deterioration and ensures your table remains sturdy and functional for years to come․ Ensure all cuts and drills are made with precision to avoid splinters․ Always wear safety goggles and gloves when handling power tools and lumber for protection․ When building a 6-foot picnic table, prioritize safety to avoid accidents․ Always wear safety goggles and gloves to protect yourself from sawdust and sharp edges․ Ensure your workspace is clean and well-lit to maintain visibility and prevent tripping hazards․ Use clamps to secure lumber during cutting or drilling to avoid accidental movements․ Follow the plans carefully and double-check measurements before making cuts․ Test all joints for stability before applying final screws․ Avoid over-tightening screws, as this can cause wood splitting․ Keep loose clothing tied back and long hair tied up when operating power tools․ Regularly inspect tools for damage and ensure they are in good working condition․ Always unplug tools when not in use or during blade changes․ Proper preparation and caution will ensure a safe and successful project․ Proper safety gear is essential when building a 6-foot picnic table․ Always wear safety glasses to protect your eyes from flying debris and dust․ A dust mask is crucial when sanding or cutting wood to prevent inhaling harmful particles․ Steel-toe boots or sturdy footwear can prevent foot injuries from dropped tools or heavy materials․ Gloves provide grip and protect hands from splinters and cuts․ Hearing protection, such as earplugs, is recommended when using loud power tools like circular saws or drills․ Ensure all gear fits properly and is worn consistently throughout the project․ Taking these precautions will help prevent accidents and ensure a safe, enjoyable building experience․ Remember, safety should always be your top priority in any DIY project․ When building a 6-foot picnic table, avoid common mistakes to ensure a sturdy and functional outcome․ One frequent error is inaccurate measurements, which can lead to uneven surfaces or poor fitment․ Always double-check your cuts and drill holes before assembling․ Another mistake is using untreated wood, which can rot quickly when exposed to outdoor conditions․ Properly seal or treat the wood to enhance durability․ Additionally, some DIYers overlook the importance of pre-drilling holes, which can cause wood to split․ Ensure all screws and bolts are tightened evenly to avoid wobbling; Finally, don’t skip the sanding process, as rough edges can lead to splinters․ By addressing these issues, you’ll create a picnic table that lasts for years․ Attention to detail is key to a successful project․ Free 6-foot picnic table plans are widely available online․ Download PDF guides, watch video tutorials, and explore community forums for detailed instructions and expert tips to ensure success․ Free PDF downloads for 6-foot picnic table plans are readily available online, offering detailed step-by-step instructions, material lists, and diagrams․ These plans are designed to help DIY enthusiasts build a sturdy and attractive picnic table with minimal cost․ Many PDF guides include cut lists, shopping lists, and measurements in imperial units, ensuring accuracy and ease of use․ Websites like Construct101 and Bobs Plans provide comprehensive free PDF downloads, complete with optimized material usage and traditional designs․ These resources are ideal for beginners and experienced woodworkers alike, guaranteeing a professional finish․ Downloading these plans allows you to start your project immediately, saving time and money while creating a durable outdoor fixture for years of enjoyment․ Video tutorials for building a 6-foot picnic table are an excellent resource for DIY enthusiasts․ These tutorials provide a visual guide, making it easier to follow step-by-step instructions․ Many videos cover topics like assembling the table frame, attaching the tabletop, and constructing benches․ They often include tips on measuring, cutting, and securing lumber effectively․ Some tutorials also focus on safety practices and tool usage, ensuring a smooth and safe building process․ By watching these videos, beginners can gain confidence, while experienced woodworkers can refine their techniques․ Most tutorials are free and readily available on platforms like YouTube, complementing the free PDF plans․ They offer a comprehensive learning experience, helping you achieve a professional-looking picnic table without hiring professional help․ Community forums are invaluable resources for DIY enthusiasts working on 6-foot picnic table projects․ These platforms offer a space to share ideas, ask questions, and learn from experienced builders․ Many forums feature discussions on troubleshooting common issues, such as uneven tabletops or loose joints․ Users often post photos of their projects, seeking feedback or tips for improvement․ Additionally, forums are great for discovering customization ideas, like adding cupholders or decorative trim․ Some communities even share links to free PDF plans and video tutorials, making them a one-stop shop for guidance․ Engaging with these forums can help you avoid mistakes and gain confidence in your DIY skills․ They foster a sense of camaraderie and provide endless inspiration for your outdoor projects․ Building a 6-foot picnic table is a rewarding DIY project that enhances outdoor spaces and fosters memorable gatherings․ With free PDF plans and step-by-step guides, anyone can create a durable and stylish table․ The process not only saves money but also allows for personalization to suit your style․ Whether you’re a novice or an experienced builder, the sense of accomplishment from creating something functional and beautiful is invaluable․ By following the plans and tips outlined, you can enjoy a well-crafted picnic table for years to come․ Don’t hesitate to explore additional resources like video tutorials and community forums for support․ Start your project today and savor the joy of outdoor dining with family and friends!Customization Options
Maintenance and Upkeep
Protecting the Wood
Regular Cleaning
Repairing Damages

Safety Tips
Safe Building Practices
Using Proper Safety Gear
Avoiding Common Mistakes

Additional Resources
Free PDF Downloads
Video Tutorials
Community Forums